Following my Bliss
When I was in college, I read a lot of Joseph Campbell. I was an art major, which really meant I could indulge in whatever I wondered, craved or dreamt of. My thoughts were fairly evenly split between science and religion, so naturally I loved Joseph Campbell. One thing he said that has always stayed with me is, “follow your bliss”. It is such a nice idea, but really did not feel practical. I graduated from college swimming in student loan debt and holding a shiny new art degree…. sadly it wasn’t quite as marketable as the geo-physics program I started out in. So I found a job working in engineering and dutifully paid my loans, not really loving my job and missing the days of submerging myself in my own thoughts while working out ideas and questions through art. A little over a decade later I started having children; my husband and I knew I couldn’t return to work. I wanted and needed to be home with our son. I left the office and started an engineering based company out of the house. It was great, I could be home with my child and help support our family… but again, I didn’t love it. After about 4 years and another baby boy, this idea of following my bliss was feeling very important. Putting food on the table is very important, but how can I teach my boys to be all they can be if I don’t give my own dreams a try? So here I am, nearly 40, taking a leap, breaking myself from the known and comfortable to go after the things which set my mind moving.
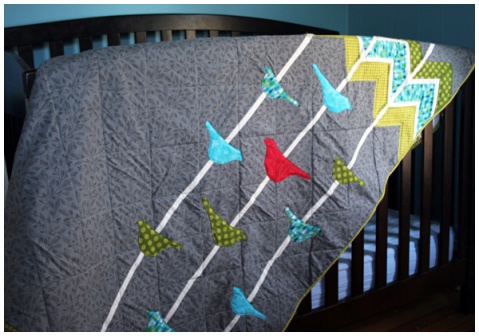
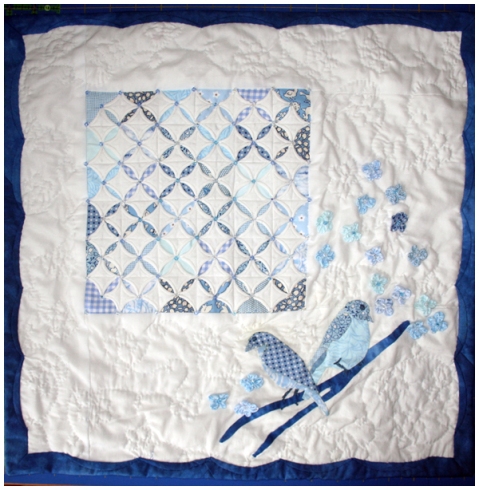
Chevrons and Birds – this quilt has been floating around my head for quite a few years, it has changed and evolved but was really begging to be made.
I have a long history and deep love of fabric and sewing, the traditions, the history, the beauty and skill – I love all of it. Much of my work in college was fabric based, it really is a part of who I am. I have been designing quilts for years, most are drawn and never made, now I am giving myself permission to make them. I have had an ESTY shop for a few years, I used it for invites. Whenever I made an invite for my own family I would post it for sale on ETSY. For the past few months I have been working on my quilts and slowly adding them to the ETSY shop. I am writing out the patterns for sale as well – those years in engineering sure have come in handy in the pattern writing department! I feel this endeavor can only have a positive outcome! Of course, there will be work and the monetary gains are not quite are fast as in my former business but I now look forward to working each night and go to sleep dreaming of what I will do next!
I think I am beginning to understand what he meant when he said to “follow your bliss” and I am looking forward to each step!
I have started a facebook page for my ETSY shop, stop by and like it if you enjoy what you see! NinaLemon on facebook!
Scalloped Edge Quilt Binding
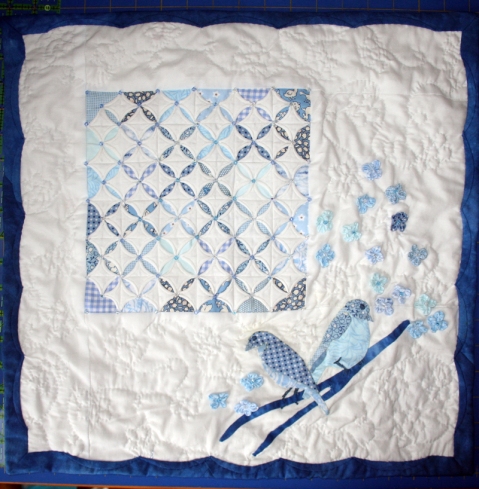
This year one of my guild’s challenges was a two color quilt, I LOVE two color quilts, totally one of my favorite things! I also love Cathedral Windows, I have been wanting to try them for a while so I decided this was the time. I didn’t really have a plan with this one, just two color and Cathedral Windows, everything else was pretty open. I ended up designing the quilt as it was built, I started with the window and quickly realized it would take me far too long to do a traditional Cathedral Window in miniature…. so, I decided to make it a window within a quilt. I have been very attracted to birds in quilts lately, which led me to the birds outside the window. Once I finished and quilted the top, a typical straight binding just didn’t seem right for this quilt, I sat with it for a bit wondering where to go next.
I came across a picture of a wall hanging quilt with this scalloped edge, it really felt perfect for this quilt. The quilt I saw had the scallops sewn by machine with a contrasting top stitch, it worked well for that quilt, however I felt this quilt needed to be hand done.
The scallop really is very easy, the method is very much like turning open the Cathedral windows.
To figure out the width of your binding strip you have to take into consideration three dimensions:
- The width of the binding on the back of your quilt (we will call this A)
- The thickness of your batting (and this is B)
- The width of the binding at the widest point on the front, and (This will be C)
My wall hanging is rather small (about 18″x18″) , I kept the back binding at 1/4″ and the front at 3/4″ at the widest part.
The formula for binding width is 2(2A+B+C). Ahhhhhh, scary math!!! Really, it isn’t scary at all.
My quilt is .25″ thick so my batting strips are:
2(2A+B+C)
2( 2(0.25)+0.25+0.75)
2(0.5+0.25+0.75)
2(1.5)
3″ wide
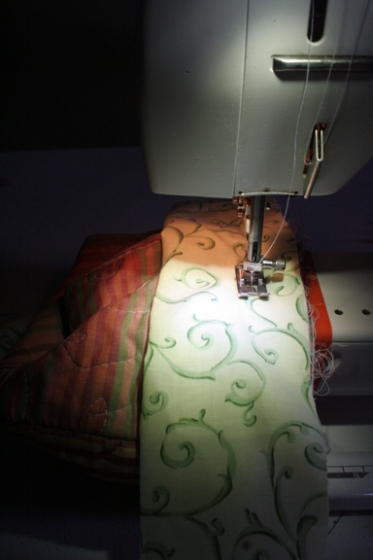
Sew your strips together, fold in half and sew to the BACK of your quilt. You will want to miter your corners carefully for this since they be very visible on the front. This is a great tutorial for continuous binding and mitered corners.
Once you have the binding sewn on, flip to the front of your quilt. Fold the binding over and pin. Measure the binding from inside of mitered corner to inside of the opposite mitered corner.
Decide on a width for you arc, for my small quilt and 3/4″ width binding I used a 3″ wide arc.
Mark the center of your side with a pin and then mark the end point of your arcs. For the end points of the arcs, I marked with chalk and only pinned one arc at a time. This reduced the number of pins sticking in to me 🙂
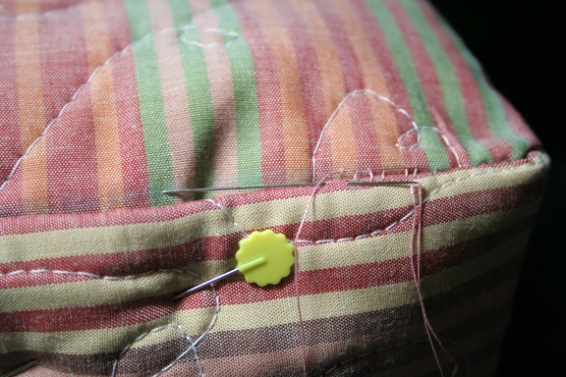
Pin your marked lines for the first arc segment, then fold the batting up to form the arc. Your pins will keep the binding in place for the bottom of the arc. Once you have the fold placed how you like it, pin the the fold.
I am a big fan of the Ladder Stitch, I learned it from Ami Simms at a workshop a few years ago and have found it works for just about everything! This binding is no exception, using the ladder stitch (or your favorite applique stitch), sew together your mitered corner, continue to your first arc and sew around the arc. I choose to work one arc at a time, pinning as I go.
You could sew along the bottom of each arc and return along the tops, but this requires a lot of pins in the quilt at one time. I know myself, I am accident prone! Too many pins equals too many pokes and potential blood on the quilt! I don’t care about the discomfort of a prick, but no blood on the quilts!!! 😀
Continue working around the quilt, until you have finished sewing down all of your arcs.
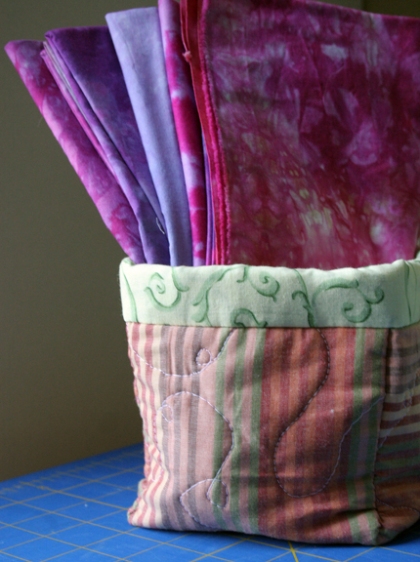
A quick quilted fabric box.
Free motion quilting is not a talent of mine. I would much rather be hand quilting, where I feel I have much better control of my stitches. I love my machine, but putting that darning foot on and dropping the feed dogs sends me into a bit of a panic! Hand quilting isn’t always going to fit into my schedule so sometimes… machine quilting it is. In such cases, before I get started I pull out a couple of old fat quarters and do some practice quilting. I end up with all of these quilted squares hanging around; I want to toss them, but I can’t. I just know there must be something I can do with them!
The other night night, I was quietly nursing and rocking my youngest and I started to think of origami. I love all of the things you can create from a simple square of paper, animals, stars, flowers… then I thought of my quilted squares. I was folding and turning the squares in my head and almost immediately saw a box, a very simple box!
Today, I decided to try it out.
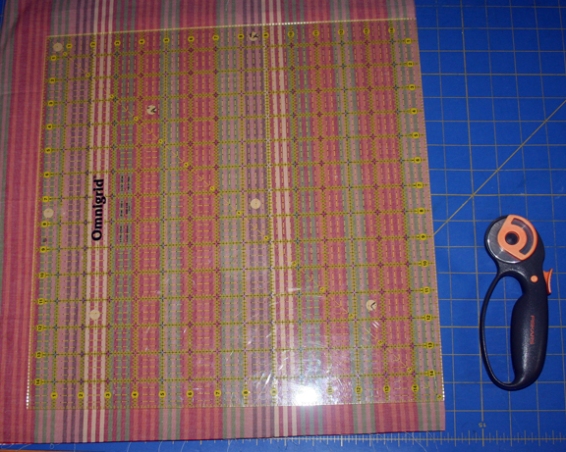
I started this just like any other practice quilting run, I found two fat quarters, sandwiched them with some batting and squared them up. I chose 15″ because I had a batting scrap a little larger than that.
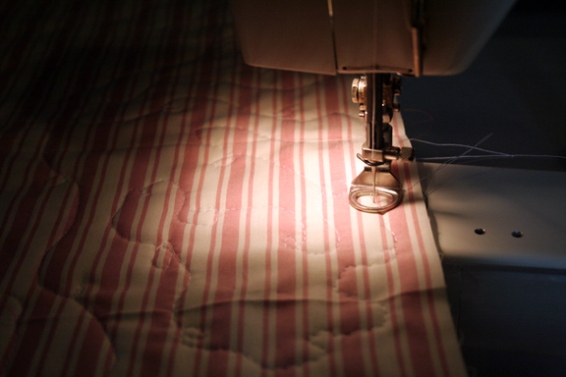
Next I pinned the 3 layers together, sketched out a quilting design and set to work quilting it on my machine.
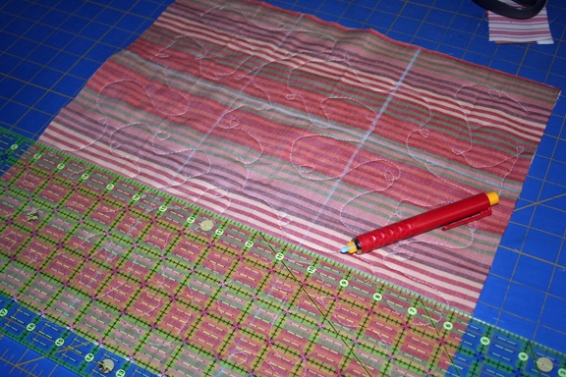
Next you have to decide on how tall you want your box. I decided to make a sqaure box with 5″ sides and a 5″ bottom.
Draw lines marking your sides, if you are going to have 5″ tall “walls” or sides of your box, measure and mark 5″ in from the outside. Do this on the fabric which will be the OUTSIDE of your box.
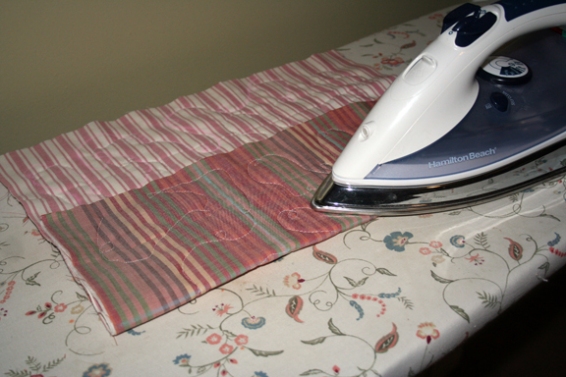
Take the sandwich to your ironing board and fold along this line and then press. Repeat the process for all four sides.
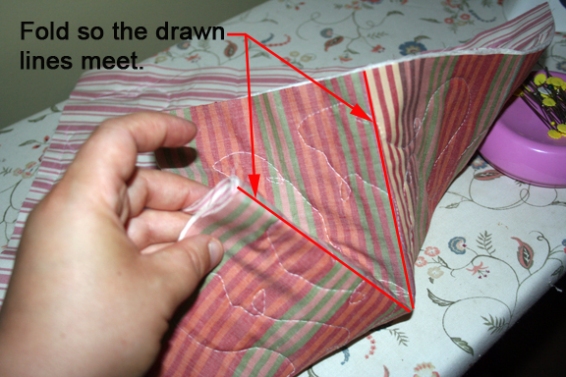
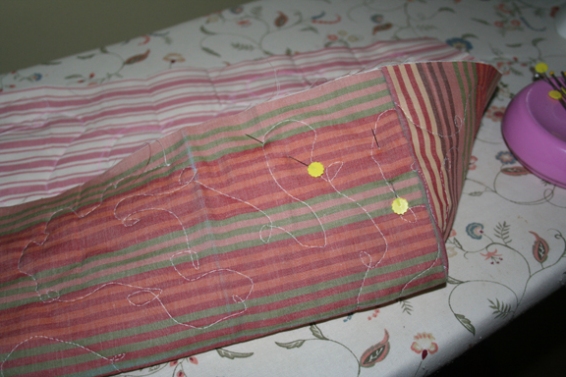
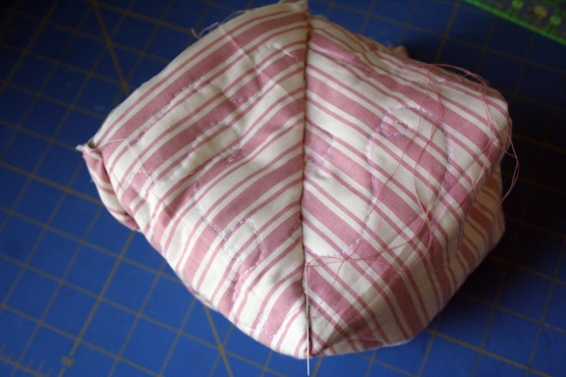
Next, fold up two adjoining sides, at the corner match the draw lines, folding the excess fabric into a triangle.
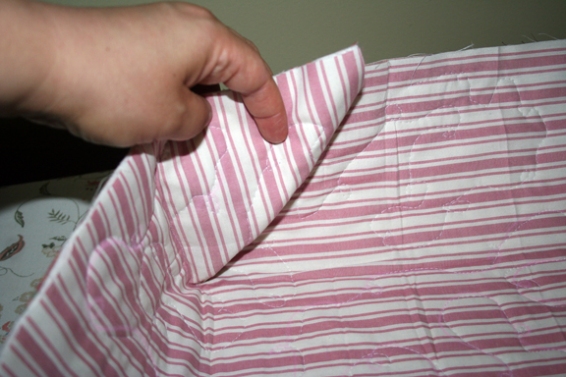
Lay the resulting triangle along a wall of the interior of the box, matching the top edges. Continue to do this with each corner always laying your triangle along a new wall. When you finish each wall will have a half triangle and the thickness of each wall will be the same along the top.
Now it is time to sew up the sides, I like the look of a ladder stitch. When you pull the thread tight it will disappear into the fabric, giving you a very clean edge.
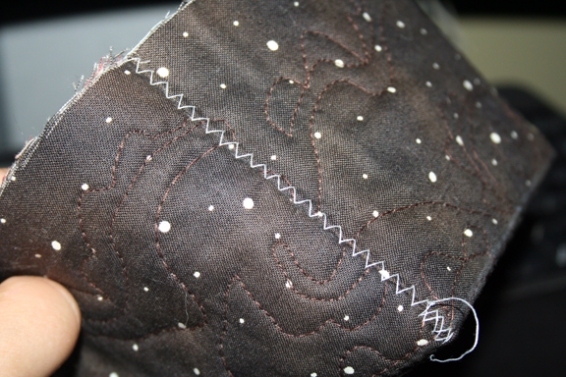
If you prefer not to hand sew, you could use a wide zigzag
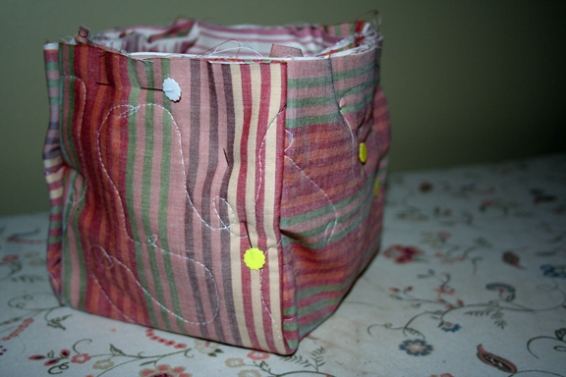
Continue, using your preferred method along each corner. Next, flip the box inside out and sew down the triangles. Again, I prefer to hand sew, but this could also be done on your machine. Keep in mind if you use your machine for this step you will have a zigzag showing diagonally on the outside of your box.
Now all we have left to do is bind the top! To have a 1″ wide binding cut your fabric into 7″ strips. I do not press my binding in half before sewing because the fold is never exactly in the center.
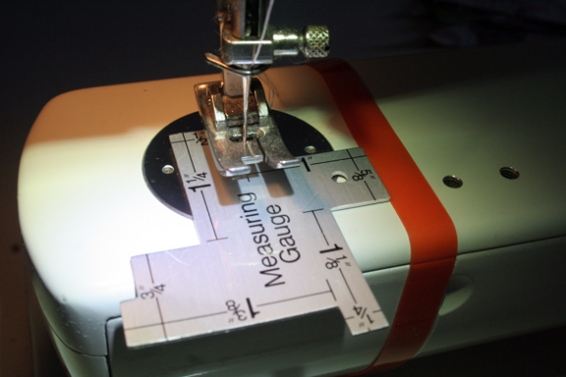
Mark where a 1″ seam allowance falls on your machine.
Fold your binding in half, match the raw edges of the binding with the raw edges of the box and machine stitch the binding to the outside of your box. It is best to start sewing about 1/3 of the way in from a corner, be sure to leave a 6″ or 7″ tail of binding before you start sewing.
I typically close my binding with a continuous binding method (this is a great tutorial for continuous binding) however the box is so small, I found a square end to be best.
If you are unfamiliar with how to attach a binding, follow these basic steps:
After finishing off your binding, flip the box inside out and sew you binding down to the inside of the box.
Flip your box right side out and you are done!
What to do with charm packs?
I am one of those lucky girls to have a wonderful mother-in-law. She is kind, thoughtful, considerate, doesn’t offer unsolicited advice and never forgets a birthday. On one such birthday she gave me a gift card to a fabric shop and a cute little pack of triangle charms.
Of course the pack came with a little pattern for a bag, but it didn’t thrill me. When I looked at the little triangles I kept thinking of those strings of flags you see hung at cheesy car dealerships or old time family picnics. Now, this image probably only exists in my romantic nostalgia (of a time I never lived, LOL), I kept seeing a 1950’s family: Dad smiling over the grill and Mom serving watermelon wedges to the perfectly tidy kids, who are patiently and gleefully sitting at a plastic covered picnic table anticipating a family meal. That scene probably never happened (seriously, tidy, happy children patiently waiting for a meal??? even in my 1950s daydream it is a stretch), how I arrived there from a pack of triangle charms we’ll never know, I must need more sleep!
This little delusional vision resulted in a super easy and super cute and quick summery wall hanging!
I paired up the triangles and sewed down two sides.
Flip the triangles right sides out and press
I cut off the little bunny ears and then sewed them to strips of fabric which were 2.5″ wider than the triangles were long. This gives some space between the rows and allows for the 1/4″ seam allowance.
Sew the three rows together and viola!
A fun fast wall hanging with a little 3D flair!

